Holding On

Journaling:
Every little baby
Comes into the world
Reaching for an anchor
Fingers tightly curled
Grasping for a reason
Without knowing why
We will cling to anything
`Till the day we die
We can hold onto sorrow
Hold on to pain
We can hold on to anger
When there is nothing to be gained
We can hold to a thread
At the end of a rope
But if we hold on to Jesus
We are holding onto hope
(Twila Paris)
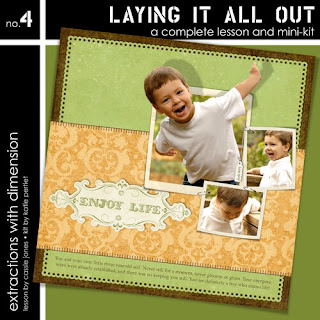
Oh I can't remember if I posted this layout here or not, but I think it deserves a repost. I created this layout several months ago, but this month I have felt like I was at the end of my rope more than once. Discouragement and depression kept wanting to wind their way into my heart. Then I thought about this layout and the words---and I know that with Jesus there is hope. I know it might sound trite, but I've walked through some hard times and He has always been faithful. Someday I might elaborate, but for now I'm basically preaching to myself--reminding myself that He is faithful.
-------------------------------------
Digital supplies used in this layout:
all from http://www.designerdigitals.com/
Watery Corners brushes n stamps by Katie Pertiet
Labels: Digital Scrapbooking
posted by Mozer at
11:02 PM
5 Comments
![]()


 File Folder Game


