Computer Crafts--Farm Magnet Set
I went back to the archives today to share a project I posted a year ago. My daughter still enjoys pulling this set out and playing with it.
 One of my hobbies is digital scrapbooking. I never thought I'd switch from paper scrapping to digital, but I did and now I love it! One of the advantages is that I can purchase one kit and use it for a scrapbook page and then turn around and use the same kit to create another project. Even if you are not a digital scrapper, you can still use digital products for custom printables (for personal use). If you purchase products in jpeg or png form, you can use them with your word processing program just like you do any other clipart.
Creating a Farm Magnet Set
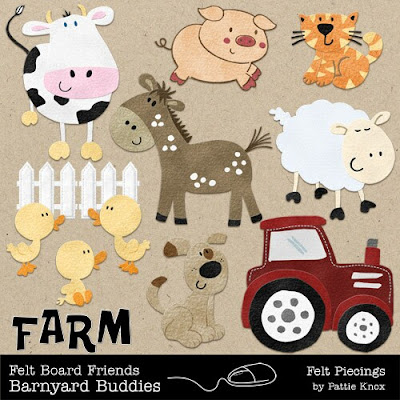
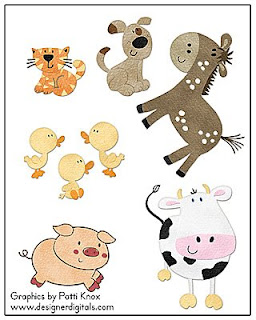
Recently I created a farm magnet set for DD#3. I used a digital set by Pattie Knox. I actually created my set in Adobe Photoshop Elements , but you can use OpenOffice or other word processing programs too. Since OpenOffice is free, and that is what I have loaded on my computer, I'll show some basic steps using that program.
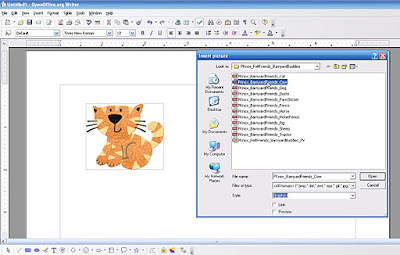
4. Now the image is in your document. Follow the same steps for all the images you want to include in your magnet set. You can make your image smaller or larger by clicking on the image in your document. You will see the image surrounded by little green boxes, or handles. If you press shift while dragging those handles either in or out, it will resize your image proportionally, without causing it to get skewed.
5. To create the word tiles, I inserted a table into the document. Insert a photo following the instructions in #3. Resize the image so that it is small enough to fit in the table. Right click on the image>Wrap>Optimal Page Wrap. Then type your word. Repeat this process for all the words.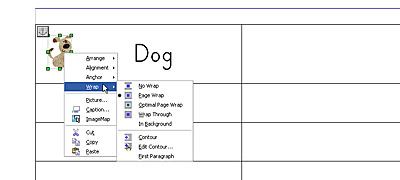
 One of my hobbies is digital scrapbooking. I never thought I'd switch from paper scrapping to digital, but I did and now I love it! One of the advantages is that I can purchase one kit and use it for a scrapbook page and then turn around and use the same kit to create another project. Even if you are not a digital scrapper, you can still use digital products for custom printables (for personal use). If you purchase products in jpeg or png form, you can use them with your word processing program just like you do any other clipart.
Creating a Farm Magnet Set
Recently I created a farm magnet set for DD#3. I used a digital set by Pattie Knox. I actually created my set in Adobe Photoshop Elements
, but you can use OpenOffice or other word processing programs too. Since OpenOffice is free, and that is what I have loaded on my computer, I'll show some basic steps using that program. 1. First download Barnyard Buddies by Patti Knox. It will come as a zipped file. Unzip using an unzipping utility. [Your computer probably came with one, but if not, click here for some options.]
2. Open a new document in your word processing program.
3. Go to Insert>Picture>From File ---Go to the Barnyard Buddies folder on your computer. Click on an animal and press Open.
4. Now the image is in your document. Follow the same steps for all the images you want to include in your magnet set. You can make your image smaller or larger by clicking on the image in your document. You will see the image surrounded by little green boxes, or handles. If you press shift while dragging those handles either in or out, it will resize your image proportionally, without causing it to get skewed.
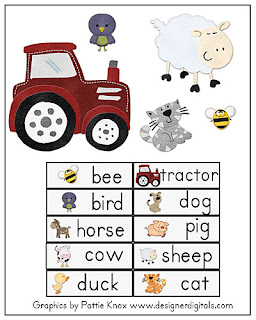
5. To create the word tiles, I inserted a table into the document. Insert a photo following the instructions in #3. Resize the image so that it is small enough to fit in the table. Right click on the image>Wrap>Optimal Page Wrap. Then type your word. Repeat this process for all the words.
6. Once you are done, save your project and print on magnet paper. If you don't have magnet paper, you can print on cardstock, laminate, cut and adhere magnet strips to the back. (I actually printed mine on cardstock and then ran it through my Xyron 900 using the magnet/laminate cartridge
 )
)
using the magnet/laminate cartridge)Uses:
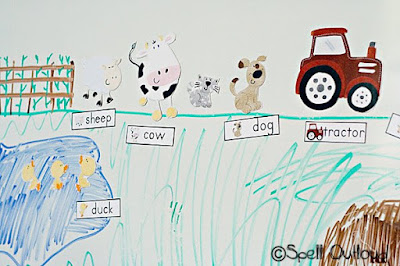
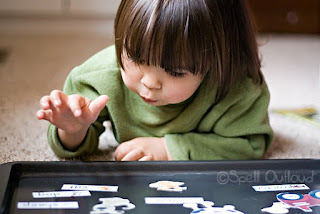
--Pretend play on a cookie tray or a magnetic dry erase board (my older kids enjoyed drawing a farm scene for DD#3 on the dry erase board.)
--Match the words with the picture (yes, I added the little picture by the word because at this age they are not reading---it is more matching pictures)
--Use the words in a rebus story
--Pretend play on a cookie tray or a magnetic dry erase board (my older kids enjoyed drawing a farm scene for DD#3 on the dry erase board.)
--Match the words with the picture (yes, I added the little picture by the word because at this age they are not reading---it is more matching pictures)
--Use the words in a rebus story
Other ideas:
Using the same clipart, you can create farm yard dominoes, flashcards, memory match, birthday cards, scrapbook pages---the options are endless.
If you end up creating a similar project, I'd love to see it!
**Please contact me for permission to use any images or content from Spell Outloud. Linking to this article is an acceptable way to share this information and is encouraged :)
To receive the latests updates from Spell Outloud click here to subscribe to this blog
To receive the latests updates from Spell Outloud click here to subscribe to this blog
Labels: Computer Crafts, Designer Digitals, How To's, OpenOffice, toddler time
posted by Mozer at
9:00 AM
5 Comments