Thursday, April 15, 2010

Computer Crafts--Farm Magnet Set

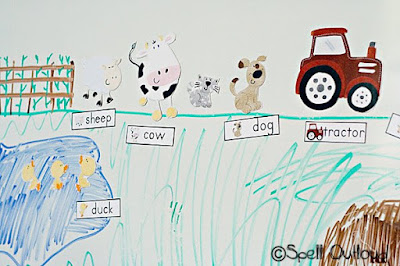
I went back to the archives today to share a project I posted a year ago. My daughter still enjoys pulling this set out and playing with it.

One of my hobbies is digital scrapbooking. I never thought I'd switch from paper scrapping to digital, but I did and now I love it! One of the advantages is that I can purchase one kit and use it for a scrapbook page and then turn around and use the same kit to create another project. Even if you are not a digital scrapper, you can still use digital products for custom printables (for personal use). If you purchase products in jpeg or png form, you can use them with your word processing program just like you do any other clipart.

Creating a Farm Magnet Set
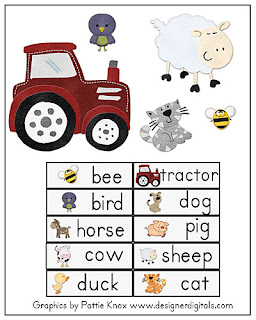
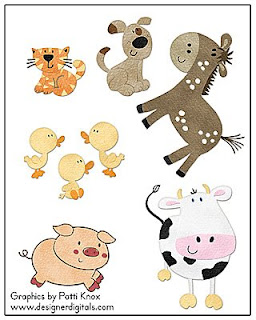
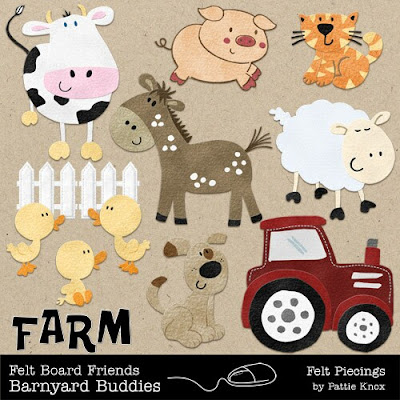
Recently I created a farm magnet set for DD#3. I used a digital set by Pattie Knox. I actually created my set in Adobe Photoshop Elements, but you can use OpenOffice or other word processing programs too. Since OpenOffice is free, and that is what I have loaded on my computer, I'll show some basic steps using that program.
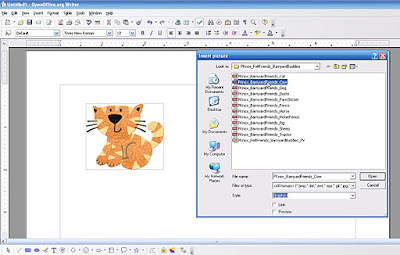
1. First download Barnyard Buddies by Patti Knox. It will come as a zipped file. Unzip using an unzipping utility. [Your computer probably came with one, but if not, click here for some options.]

2. Open a new document in your word processing program.

3. Go to Insert>Picture>From File ---Go to the Barnyard Buddies folder on your computer. Click on an animal and press Open.


4. Now the image is in your document. Follow the same steps for all the images you want to include in your magnet set. You can make your image smaller or larger by clicking on the image in your document. You will see the image surrounded by little green boxes, or handles. If you press shift while dragging those handles either in or out, it will resize your image proportionally, without causing it to get skewed.

5. To create the word tiles, I inserted a table into the document. Insert a photo following the instructions in #3. Resize the image so that it is small enough to fit in the table. Right click on the image>Wrap>Optimal Page Wrap. Then type your word. Repeat this process for all the words.
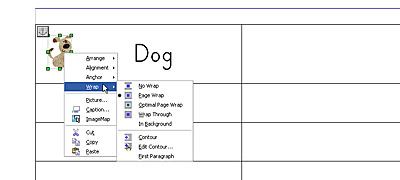
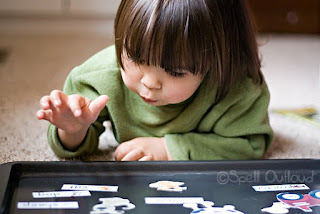
6. Once you are done, save your project and print on magnet paper. If you don't have magnet paper, you can print on cardstock, laminate, cut and adhere magnet strips to the back. (I actually printed mine on cardstock and then ran it through my Xyron 900 using the magnet/laminate cartridge)
Uses:
--Pretend play on a cookie tray or a magnetic dry erase board (my older kids enjoyed drawing a farm scene for DD#3 on the dry erase board.)
--Match the words with the picture (yes, I added the little picture by the word because at this age they are not reading---it is more matching pictures)
--Use the words in a rebus story


Other ideas:

Using the same clipart, you can create farm yard dominoes, flashcards, memory match, birthday cards, scrapbook pages---the options are endless.
If you end up creating a similar project, I'd love to see it!


**Please contact me for permission to use any images or content from Spell Outloud. Linking to this article is an acceptable way to share this information and is encouraged :)

To receive the latests updates from Spell Outloud click here to subscribe to this blog

Labels: , , , ,

Monday, April 12, 2010

Planting a Rainbow:Craft


I love that is has finally been feeling like spring! The kids and I have enjoyed watching the robins hopping around eating worms and building nests. The tulips and other spring flowers have bloomed, and the trees are beginning to bud. So for this week for our Tot school, I checked out Planting a Rainbow by Lois Ehlert.

This book is a fun way to introduce children to gardening. Each page has vibrant illustrations of bulbs and flowers. Children can see how different plants and flowers come in all different colors----all the colors of the rainbow.

After reading the book, my daughter worked on a color-matching game and did a flower craft.


File-folder game:
Supplies
1 file folder
1 large piece of black fun foam or construction paper
colorful craft sticks--mine are fun foam sticks
glue

Directions:
1. Glue the craft sticks onto one half of the file-folder in the order shown in the book: red, orange, yellow, green, blue, purple.

2. Glue the piece of black fun foam/construction paper over the bottoms of the sticks to represent the soil.

3. Tape a large Ziplock bag on the other half to hold the rest of the popsicle sticks for matching.

4. Have the child place the matching colors on top of the glued-down sticks.

5. Optional: On plain wooden sticks, write the name of each color and have the student try to match the color name to the colored stick.

6. Optional: Use different color flower punch-outs or foam shapes and have the children match the correct color flower to the correct color stick.


Planting a Rainbow Craft:

Supplies:
1- 8x10 or 8 1/2 x 11 black picture frame (I purchased mine from the Dollar Store)
1 - large piece of black fun foam
1 - fun foam pieces of each color: red, orange, yellow, green, blue, purple
Craft Glue
Green chenille sticks
Packing Tape
Glue Dots (optional)

Directions:
1. Using the book as inspiration, cut 1 flower for each color out of fun foam. I free-handed everything. It doesn't need to be perfect. It does help to add a couple layers--ie flower centers, to the flowers.


2. Once the flowers are all cut out, have your student glue any pieces that need to be glued together. Let the flowers dry. (This is when we did the file folder game---or go outside and see if you can find any plants in _______ color.)

3. Fold the green pipe cleaners (chenille sticks) in half and cut. These will be the stems for the flowers. Tape the stems to the back of the flowers.

4. Take your photo frame and remove the glass and any inserts. Mine had a nice brown textured board as the background which I thought would look nice with the flowers. You can add a piece of colored construction paper or fun foam cut to size.

5. Arrange the flowers onto the picture frame in the order of the book: red, orange, yellow, green, blue, purple. The only item that needs to be glued down is the green "fern-like" plant.


6. Tape the flower stems to the back of the picture frame. I used packing tape because it was a stronger hold than regular Scotch tape. You could use Glue Dots. (Both my girls helped tape the flowers onto the board).


7. After the flowers are adhered to the background of the frame, adhere the black fun foam over the flower stems onto the frame. You can use craft glue, glue dots or double-sided Super Tape. You may find that you need to adhere parts of the flowers down in various places so that they don't fall forward. Glue dots work well for that.

We added a cute little worm in the dirt. Now we have our own rainbow garden hanging on the wall for all to see.

Extensions:
1. We will be planting our own real rainbow garden as soon as the Farmer's Market starts up. It's still a little early where I live to plant things.

2. Read: The Black Book of Colors: This is a book of colors that is meant to be felt, not seen. It tells how blind people relate to colors.

After reading this book, go on a scavenger hunt and gather things to create your own color book collage using the items mentioned in the book.


If you'd like to share these craft ideas with others, please link directly to this post. Do not copy onto another site without permission.


Labels: , , , ,

Monday, March 29, 2010

Easter Egg Place-Holders:Tutorial

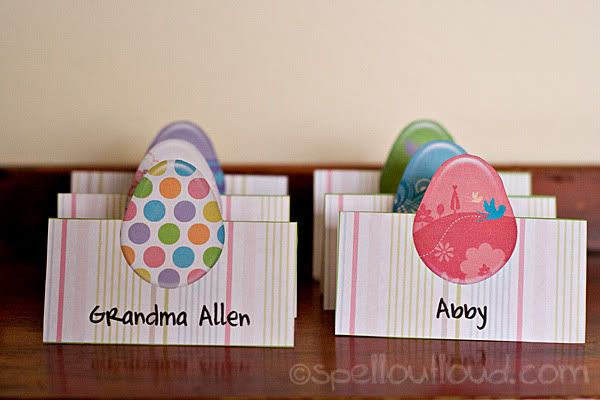
Since I'm hosting Easter at my house this year, I thought having Easter place holders would be a fun way to decorate the table. These pop-up egg cards look great and really didn't take much time to make. Here's how I created them: (I use Photoshop Elements 6.0 on a PC-- some commands might be different in other versions or on Macs.)

1. Open up a new 8 1/2 x 11 document at 300dpi.

2. Use the rectangle marquee tool. I set mine as a fixed size: 3in. by 1.5in.

3. On a new layer add a stroke to the outside of the rectangle (in PSE Edit--Stroke--5pixels outside)


4. You should now have one rectangle. Duplicate this layer (CTRL-J) and line the top edges. The middle line will be the fold line for the name plate. At this point you can merge these two layers together.


5. Add papers or other decorations as desired. (Hint: I created a mask for the papers. I opened a new layer then highlighted the inside of the first rectangle with the magic wand tool (W). I then went back to the new layer and filled it with a solid color (bucket tool--K). I repeated with the second rectangle. That way I could clip papers to the mask and it would fit perfectly. This makes switching out papers a breeze.)

You can see how I clipped (CTRL-G) the Cheeky Time paper by Mindy Terasawa to the mask below.


6. Open up Egg Pebbles by Katie Pertiet. Place one image onto the place holder document. Position it so that half the egg is on the bottom rectangle and half is on the top.


7. Type the guest's name.

8. Fill the page up with as many name plates as possible. (Actually to make it easier for me, I open a new 8 1/2 x 11 document. Then I merge the layers of the finished place holder and drag it onto the new layer. Next I go back to the original document, undo the merge---ctrl z, change the name and the egg color and repeat.)

9. Print onto paper.

10. Using an Exacto-knife, cut the top portion of the egg out. Then fold on the middle line.

Labels: , ,

Saturday, February 6, 2010

Printable Valentines

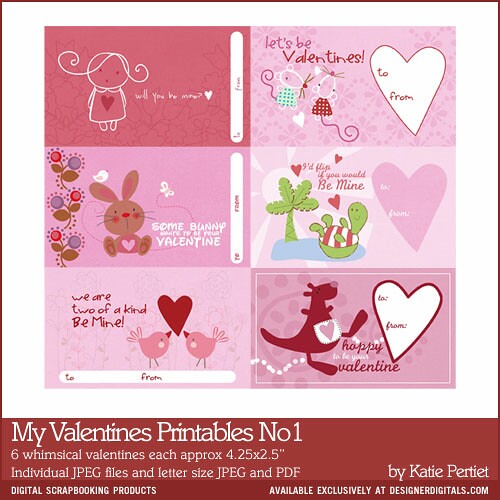
This year my oldest daughter wanted to make some Valentine candy sets to give to her friends. The easiest way I could think of was to print out already-designed Valentines and use those in different ways.  We decided to use Katie Pertiet's Valentines.

printable valentines

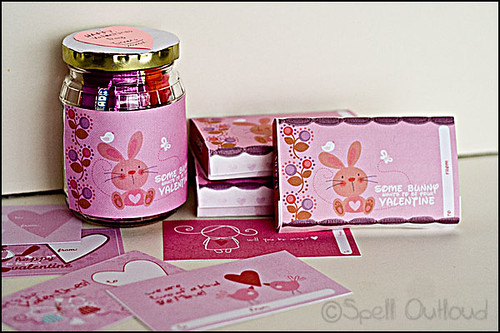
I printed them out on cardstock, but photo-paper, or regular paper would work too. It all depends on what you will do with the image. For Valentines to pass out, print on cardstock. For images to adhere to candy boxes or jars, photo-paper works well. For making matchbook covers, regular paper or cardstock works best.

valentine stuff

My oldest daughter was able to put together this set in no time. I did customize the Valentine to wrap around the candy box. The rest I printed out from the PDF file. An easy way to create a matching set!

For more Valentine craft ideas see: Valentine Candy Holders

Labels: , ,

Wednesday, January 20, 2010

Getting Crafty

I've actually accomplished a couple of crafty things this past week. Before I turned to digital scrapbooking, I used to do lots of altered arts projects along with traditional scrapbooking. I haven't done much with that hobby in the last 4 years. I've been missing doing some hands-on art projects and thought I'd ease back into things with an easy project.


I had picked up a bunch of composition books on sale earlier this year and I thought I'd create some altered composition books. I went ahead and made a tutorial on how to make the books. I can't wait to make more and use more of my collage-y stuff with it.


I actually have one layout scrapped of Christmas. ;) I don't know why, but I always have a hard time scrapping the holidays. This is my bro. and my youngest dd.  All supplies from Designer Digitals.


I know I mentioned this before, but if you're looking for some crafty Valentine ideas check out the Valentine Candy Holders article I wrote for Squidoo.

Thanks for all the ideas you've been sending my way re: getting time for school planning and math. I appreciate the emails! :)

Labels:

Sunday, October 4, 2009

Under the Sea Tic-Tac-Toe Game

Ocean Craft

We have started our ocean theme with co-op this year and are having a blast. I teach the preschoolers, and since I have 3 boys and one girl, I find I need to switch things up often during class. We usually do some sort of movement rhyme, read a story, do another movement activity, lesson and then a game. It looks like alot, but most of the activities only take about 5 minutes.For this week's class I created a tic-tac-toe game. Two of the children will be playing this game while the other two will be playing Under the Sea Memory Game.

Materials:
1 9x12" piece of blue fun foam
1 green piece of fun foam
1 brown fun foam, sandpaper or cardstock
12 circle lids (mine were lids from Dean's Milk Chugs--I love how big and chunky they are--a perfect size for little hands)
glue
clipart
ocean fun foam stickers (optional)

Ocean Crafts

Procedure:
1. First measure the diameter of your lids. The lids I used were a little over 2inches wide.
2. Use a graphics program or word processing program to create the images for the tops of the lids. Since my lids were almost 2 1/2" wide, I created 2" circles using clip art from Mindy Terasawa's Sweet and Salty stickers and paper from her Sweet and Salty Kit

options: If you don't want to use clipart you can use die-cuts, stickers, or fun foam shapes.

3. Print the images and cut. Adhere onto the lids. I ran mine through my Xyron 900 sticker maker. You could use spray glue or craft glue.

4. Optional but recommended :) Use paper Mod-Podge or Krylon's Crystal Clear Spray Coating over the printed images to create a seal. This will help protect the pieces, since they will be handled frequently. When using Mod-Podge, it is best to paint a thin layer over the image and let dry for 10 minutes, then go back and do another layer. If you apply the Mod-Podge too thick, it can cause the paper to bubble.

5. Draw a tic-tac-toe grid in the center of the blue fun foam with a Sharpie marker.

6. Tear a piece of brown fun foam/sandpaper or cardstock. Adhere to the bottom of the blue fun-foam piece.

7. Cut out sea-weed from the green fun foam. Glue to the sides of the blue base piece.

8. Decorate with additional images or stickers if desired.

Extension:
Instead of playing tic-tac-toe, use the counters to create patterns. Have the children try to guess what the next piece would be in the pattern.


Labels: , ,

Tuesday, September 8, 2009

Apple Craft

One of my favorite parts of the end of summer/beginning of fall is enjoying apples. As I mentioned before, I'm working on an apple unit with my 2 1/2 yr. old and 7yr. old (and certain activities the older ones join in too). Oh and if you click on the link above, could you please answer our informal apple survey? My kids will be compiling the results later this week :)

Here's a peek at one activity we recently did together. To see the rest check out my guest post at 3 Boys and a Dog.

Labels: , ,

Saturday, July 18, 2009

How to Create Custom Flashcards with Open Office

I've had several emails from readers saying that there is no way they can create their own printables. Oh yes you can! :) I normally create most of my items with Photoshop Elements, but you can create wonderful things without expensive programs and I'm going to show you how.

First you need to download and install OpenOffice. Why OpenOffice? Well because it's free! When my family made a cross-country move four years ago, somehow we lost all our Microsoft CD's. They were too costly to replace and I was beyond bummed thatI did not have access to a word processing program. Someone mentioned OpenOffice and I've been using it ever since!

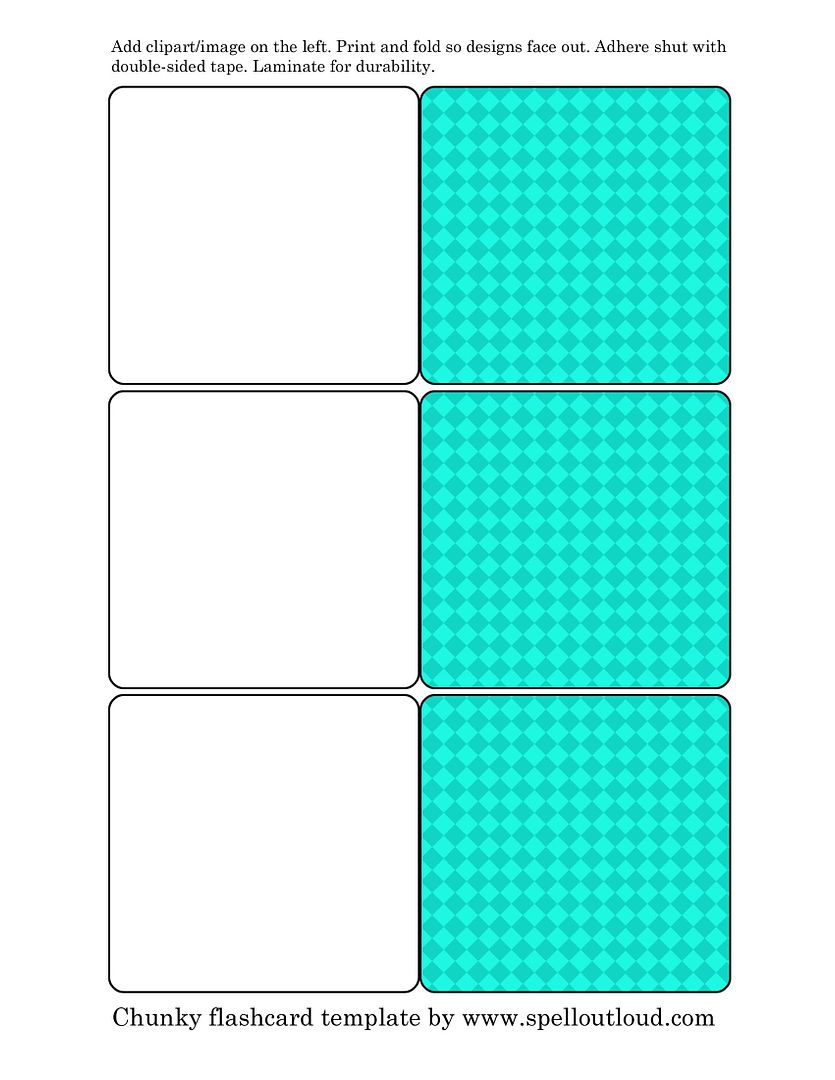
Next download and save my chunky flashcard template.

After you've downloaded and installed the program, open Create a Text Document.


Go to Insert>Picture>From File ---then go to where you saved the flashcard template.


This should insert the template as the background of your document. You will notice that the image is active when you see green squares (or "handles") around the image. In order to deactivate the photo, click toward the end of the document. You should get the text prompt(flashing vertical line).


Now repeat the process adding in the graphics on the left side of the template:

Insert>Picture>From File --- whatever graphic you've saved.jpeg

This graphic should be on top of the template image. You can move it to the appropriate square by right-clicking on your mouse and dragging the image. If the image needs to be resized, click shift and drag one of the corner handles (green boxes) either in or out (depending if you want the graphic bigger or smaller).


Once you have all the graphics in place, you can add text using the Fontworks Gallery toolbar.

Click on the T image (see arrow in the image above)


Move the text tool cursor to the area in the document that you want to create text, and click and drag to make a text box. It is active when you see the flashing horizontal line in the text box.

If you click the text box, you will notice blue squares (handles) all around it. You can click and move the text box when it is in this state. Click off toward the side or bottom of the document if you want to deactivate the text box. If you want to edit an existing text box, double click on it.


You can change the font, color, alignment on the text toolbar. Just highlight your text and make your changes.


You are done! Don't forget to save. OpenOffice has the ability to save as a PDF too. Just click the PDF icon on the top toolbar.

Tip:
If you are having problems moving a smaller graphic, make sure the large background graphic is not active (green boxes around it).

See Other Related Posts:

Under the Sea Flashcards
Barn Yard Magnet Set

---------------------------------------
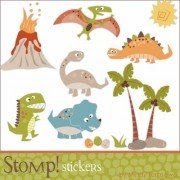
The cute dinosaur graphics are by Mindy Terasawa, www.designerdigitals.com

Labels: , , ,