Easter Egg Place-Holders:Tutorial
1. Open up a new 8 1/2 x 11 document at 300dpi.
2. Use the rectangle marquee tool. I set mine as a fixed size: 3in. by 1.5in.

3. On a new layer add a stroke to the outside of the rectangle (in PSE Edit--Stroke--5pixels outside)

4. You should now have one rectangle. Duplicate this layer (CTRL-J) and line the top edges. The middle line will be the fold line for the name plate. At this point you can merge these two layers together.

5. Add papers or other decorations as desired. (Hint: I created a mask for the papers. I opened a new layer then highlighted the inside of the first rectangle with the magic wand tool (W). I then went back to the new layer and filled it with a solid color (bucket tool--K). I repeated with the second rectangle. That way I could clip papers to the mask and it would fit perfectly. This makes switching out papers a breeze.)

You can see how I clipped (CTRL-G) the Cheeky Time paper by Mindy Terasawa to the mask below.

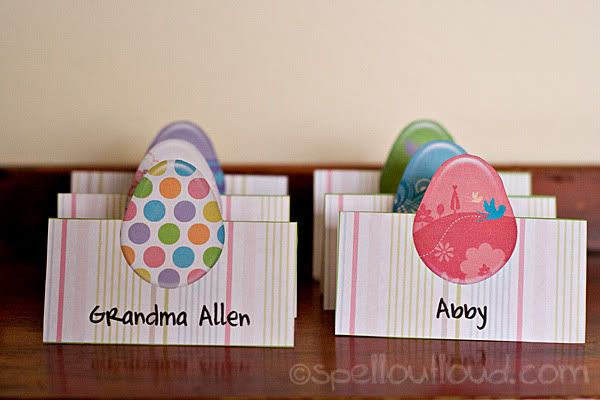
6. Open up Egg Pebbles by Katie Pertiet. Place one image onto the place holder document. Position it so that half the egg is on the bottom rectangle and half is on the top.

7. Type the guest's name.
8. Fill the page up with as many name plates as possible. (Actually to make it easier for me, I open a new 8 1/2 x 11 document. Then I merge the layers of the finished place holder and drag it onto the new layer. Next I go back to the original document, undo the merge---ctrl z, change the name and the egg color and repeat.)
9. Print onto paper.
10. Using an Exacto-knife, cut the top portion of the egg out. Then fold on the middle line.

Labels: Computer Crafts, Designer Digitals, How To's
posted by Mozer at
2:30 PM
![]()


3 Comments:
Very cute! They'll go well with our happy meals!
Really simple and sweet. I love them! Thank you for sharing!
These are wonderful! The idea would work with any number of designs or scrapbook paper. Thanks!
Post a Comment
Thanks for letting me know you were here! :) I appreciate you taking the time to write. If you have any questions, I'll try to answer it in the comments section here or via email if it is listed in your profile.
Subscribe to Post Comments [Atom]
<< Home