A blog with a little bit of homeschooling, early childhood education ideas, photography, and faith.
Friday, April 13, 2012
Human Body: Review Activities
This post wraps up our human body unit! It has been a fun year of learning about the various systems in our body and how they all work together to keep us alive! What a marvelous creator we have! If you are interested in this course, scroll down to the bottom to enter a giveaway for an Exploring Creation with Human Anatomy & Physiology book, plus either a junior notebooking journal or a regular notebooking journal.
The Immune System:
I was gone for this lesson, so my class got to sit in with the older kids. The older students were testing for bacteria and fungi. Each student got a cotton swab and rubbed it on various surfaces. They noted which surface was swabbed and then rubbed the cotton swab on agar in a petri dish.
My class did this too. They didn't record anything, but I knew they could handle observing what was going on in the petri dishes.
Yes, lovely isn't it? One student swabbed the inside of a dog food dish and this is what grew. All the kids brought their petri dishes back after a week and we observed what grew. It was kind of gross but very informative!
Anatomy Review:
I pulled out our human body magnetic board. We reviewed the organs and the names of the bones. This board also comes with flashcards, so we reviewed with those too.
I placed all the organ cards face-down on the table. I also gave each student a print-out of the human body and a tub of Play-doh.
A student would draw a card, name the organ, and then all the students would create that organ out of Play-doh on put it in the correct place on the print-out. I left up the magnetic pieces so they could use that as a reference.
We worked hard this year learning the names of some of the bones in our skeletal system. For this review, I used the flashcards in the same way as above, but all the kids worked together to create a Play-doh skeleton.
I've enjoyed documenting and sharing this series with you! If you want to see what we covered this year, check out my Human Body Unit pages.
Thanks toApologia, one reader will win a Human Anatomy book plus the notebooking journal of their choice!
A label-it page from the Anatomy Noteboking Journal by Apologia
As you know, my children have been working through Apologia's Exploring Creation with Human Anatomy book this past year in our local co-op (See our Human Body Page for details.) One of the options available is a notebooking journal that goes along with the book. Since many families are starting to plan their curriculum for next year, I thought I'd share my opinion on this component.
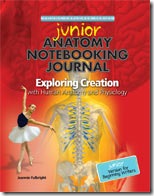
The journal comes in two formats: a junior version and the regular version. I purchased the junior version to see if it would work for my K-1 co-op class. The majority of my students were kindergarteners who were beginning writers and readers.
Pros:
- wonderful coloring pages
- primary writing lines
- personal person project
- everything already printed out and bound
Cons:
- still too much writing for my young kindergarteners
- as a co-op group, I would not be utilizing many of the pages due to time
According to the Apologia website, this junior journal is perfect for:
Younger students that have not yet mastered handwriting
Older students that are delayed in handwriting mastery
Older students with learning disabilities
Students that are new to written narration
I think the ideal age-range is 1st - 3rd for this book. If my students would have been a little older, I probably would have used this option. You can view samples of the junior anatomy notebook and get an idea of the types of pages that are included.
I also purchased the regular anatomy notebooking journal for my 9 year old daughter.
In fact, we had our whole older anatomy class (3rd- 6th) purchase the notebooking journals.
When the teachers and I looked through the journal we were impressed by the quality and the variety of pages that were included. We had considered piecing together notebooking pages like we did before Apologia came out with these journals, but once we saw the format, we knew it would be an ideal resource for the kids and for us.
Pros:
- no need to make copies so we saved on ink and time trying to find pages
- no loose pages; everything is bound which makes a wonderful keepsake for the year.
- narration pages
- copywork pages
- diagrams
- review pages
- mini-books (nice that it wasn't all journaling/narration)
- experiment procedure sheets
- personal person project
Cons:
- would have loved some older kid versions of the coloring pages too!
Personal Person Project
The coolest component is the personal person project. While learning about the body, students made their own model. Transparent overlays were used showing the different systems. I love that it was all included in the book. All the students had to do was cut out the overlays and glue them on.
I think having the journals in this class was a time-saver and helped the students learn and retain the information that was taught. I am thrilled with the quality of the journals. Of course you could teach this class without the journal, but I sure wouldn't! It is a very valuable teaching tool. Apologia has sample pages on their site for you to check out for yourself.
Check back tomorrow (Friday 4/13/2012) for a chance to win your own anatomy textbook plus notebook journal!
Our class was fascinated to learn that the largest organ in the body is skin! This was just one of the many facts we learned about our integumentary system.
We used this skin label-it worksheet from File Folder Fun to learn about the different structures in skin. This actually is a file-folder game but we used it as a skin diagram. The students cut out the labels and glued them into the right boxes after looking at the main teaching sample.
After talking about the layers of skin, we joined the older elementary group for some experiments. The older kids were just getting ready to do a skin sensitivity experiment. My kindergarten group decided to watch them do this experiment.
No kids were harmed during this experiment :)
The older kids had to see which body parts would be the most sensitive. This experiment involved paperclips bent to different widths. The parts of the body where the student was able to tell that two things were touching him when using the smallest width paperclip are the areas most sensitive to touch. Full instructions are in the Apologia Anatomy book, pg. 212. Of course my younger group wanted to see what it felt like too, so we did try it. We just didn't stick around to do all of the steps. :)
While the older kids finished up their experiment, we went ahead and took fingerprints. After each student had their fingerprints taken, we looked at them closely. Did they all look the same? Who's had an arch? a loop? a whorl?
A similar idea is to have a piece of clear tape/packing tape. Have your student press a finger down on the sticky side. What is left on the tape? Skin cells.
One fond school memory my older children have is raising butterflies. We bought a special kit, ordered our caterpillars and watched the magnificent change take place. My younger girls have been asking if they can have butterflies this year. As soon as the weather gets warmer, we will be ordering a new group of butterflies to observe. While we are waiting though, we started to learn all about these wonderful creatures by watching Your Backyard: The Monarch Butterfly from Crowe's Nest Media.
Crowe's Nest media is a company run by a homeschooling family. They aim to produce nature videos that show God's marvelous creation.The Monarch video is a semi-finalist in the upcoming San Antonio Independent Christian Film festival for Best Documentary Film and Best Creation Film. That is quite an accomplishment!
We have studied about butterfliesbefore and I thought I knew my stuff. I was pleasantly surprised at how much new information I learned about Monarchs! I had no idea about instar caterpillar stages, the difference between Monarchs and Painted Ladies, and that Monarch butterflies could be tagged.
The DVD is high-quality and presents the information in an interesting yet fun manner. All my children ages 3yrs. to 13yrs. enjoyed watching this video. I love that Crowe's Nest media showed how God wonderfully crafted these creatures. The images were stunning and I was so impressed with the children narrating the DVD. This is an awesome Christian science/nature-study resource to have-- and share with others.
After we watching the video a couple of times, we pulled out our Christian Kids Explore Science book and read more about butterflies. In the book it had a great idea of creating a butterfly life-cycle mobile---which we did. We talked about the many things we learned in the video.
Here's a closer view of the caterpillar---we think he turned out cute!
Oh no! We got a patchwork butterfly instead of a Monarch! :)
Crowe's Nest Media is in the process of finishing a downloadable study guide to go along with the Monach butterfly DVD. The study guide is designed to help children integrate the contents of the DVD and to further their learning. It will include content review, discussion questions, copy work pages for various ages, coloring pages, and opportunities for further study. There will also be notebooking pages so that children can create a "monarch" keepsake notebook. I'm looking forward to using this resource with my kids.
If you purchase the DVD now and use coupon code :SpellOutLoud you will get the study guide download free when it is available (roughly a $9.00 value) plus $1 off the initial purchase. This code is good until Friday, Feb. 3, 2012(feel free to share this code with others!)
Crowe's Nest Media is letting me giveaway 1 DVD to one of you! But wait--- there are also other bloggers giving away a copy of this wonderful DVD. Just visit each of the following blogs below for another chance to win.
*To enter, sign-in on the Rafflecopter widget. You can use your Facebook account, or under that big button is a sign-in with email link. Rafflecopter and SpellOutloud do not collect this contact information. It is only to notify winners.
Disclosure: I received this DVD and the giveaway copy in exchange for a review. The opinions stated are mine. I also will receive a small affiliate commission if you purchase the DVD using the coupon code listed above. Thank you in advance for supporting this site.
We recently had lots of fun playing with gooey, slimy, Yuck from Buckets-O-Fun. "Buckets-O-Fun is a one stop shopping with unique products for the creation of fun filled social and recreational events."
What is Yuck? Yuck products are various types of slime. They are made from an acrylic polymer and each Yuck type is different:
Chunky Yuck: It looks like rock salt when dry and hydrates to the size of machine ice cubes. Saucy Yuck: It starts out as a powder and when hydrated has the consistency of applesauce. Snowy Yuck: When dry it has the consistency of sugar. When hydrated it looks like slushy snow. Sticky Yuck: When hydrates it has the consistency of snot.
How Can it Be Used?
Yuck products are perfect for games! There is a whole game idea sheet available on using these products. These would be perfect for large group events, youth groups, co-ops, and parties! Think Yuck wrestling, Yuck balloon toss, Yuck relays and more!
We did a science experiment with one of our Yuck samples. Buckets-O-Fun has come up with some science experiments to go along with the Yuck products. We went ahead and did the Sticky Yuck experiment.
We measured, observed and created our Sticky Yuck. Then we measured how far we could get it to stretch before breaking. The kids loved getting their hands in this stuff!
Once we were done with the experiment, we decided to let the little girls have some fun. We threw in some plastic jewels and had them fish them out with spoons and forks.
You can see by her face that she was having fun! Now when using Yuck products with little ones, you do need to be careful that they don't eat any! That's the only thing that made me a little nervous using it with the younger kids. Since the polymer absorbs water, if ingested that would not be a good thing. The product is biodegradable, so once you are done you can dump it in a dumpster or garden area. Don't put down the sink though! (note: you might want to use disposable containers and silverware---it will make the clean-up much easier!)
You can see how to make Yuck by viewing this video:
My kids enjoyed playing and experimenting with Yuck. Yes, it is a little messy, but that's the whole fun point! :)
To see what others are saying about Yuck visit: Disclosure: I was given this product for review purposes only. I was not required to write a positive review. The opinions I have expressed are my own.
I believe that the best way to experience nature is go out and experience it. When that's not possible, the next best is to learn about it through books, pictures and videos. Digital Frog brings the world of natural science, ecology and geography to life via DVD's.
What is Digital Frog?
Digital Frog is a software company that creates high-quality educational, multimedia CD-ROMs with an ecological focus. Here is a listing of what they have to offer:
The Digital Frog 2.5 A comprehensive anatomy and physiology primer supported by a full interactive frog dissection.
The Digital Field Trip Series DVD All three digital field trips—The Digital Field Trip to The Wetlands,The Rainforest and The Desert—on one disc.
Each field trip DVD contains videos, interactive components, vocabulary, text and printable workbook pages (Here's a sample of the Wetlands Workbook). You can also join the Digital Frogger Club for free which enables you to have access additional worksheets and materials to go along with the DVD's.
What I Thought:
I was given the Digital Frog Field Trip Series DVD I had my 7th grader and 5th grader work through the field trips. Certain components of the field trips (the videos and field trip portion) would be interesting to younger students, but I feel overall, older elementary through middle school would get the most out of this series. The amount of reading and the vocabulary make it better for older children.
My 7th grade daughter worked through the Rainforest module and my 5th grade son worked through the Desert module. Both enjoyed working through the virtual field trip components of the modules. Another big plus for them was that they got to "learn" by playing on the computer. This is a great motivator for my son--if this information was just in a book he would have balked at doing it.
I liked that this came as a DVD. You can run it without having to have your students on-line. There is so much information packed into each field trip--so much that it can be a little overwhelming at times. The creators did a good job of adding in different elements to keep students interested. You can pan around the scene and move to different areas of the field trip so you feel like you are actually walking around. If a student does not know a word they can click on it and a definition will pop up. There is a nice mix of videos and interactive elements, games and quizzes.
Depending on how you use these DVD's, this can be a very complete science unit. Included on each DVD is a teacher's manual and a printable student field guide. Not only that, there are also graphics included if you want to make your own resources. I feel they went the extra mile to include resources for educators. If you print the field guide out, students will answer questions and take notes on the information they are accessing on the DVD. I feel like this series was very well-made and planned out.
Disclosure: I was given this product for review purposes only. I was not required to write a positive review. The opinions I have expressed are my own.